
Our Journey of Building a Charming & Secure Chicken Coop
In the beginning…
Five years ago, our journey began with a few baby chicks and an out-of-the-box chicken coop. We were thrilled to start our own flock and take a step towards self-sustainability. Unfortunately, the chicken coop we purchased turned out to be made from cheap materials and it couldn't hold as many chickens as advertised (a common issue with these types of chicken coops).
After five years have passed, our chicken coop was in disrepair. The roof was collapsing, and the run was (and always has been) inadequate for proper cleaning and security.
It was time to design a new coop.

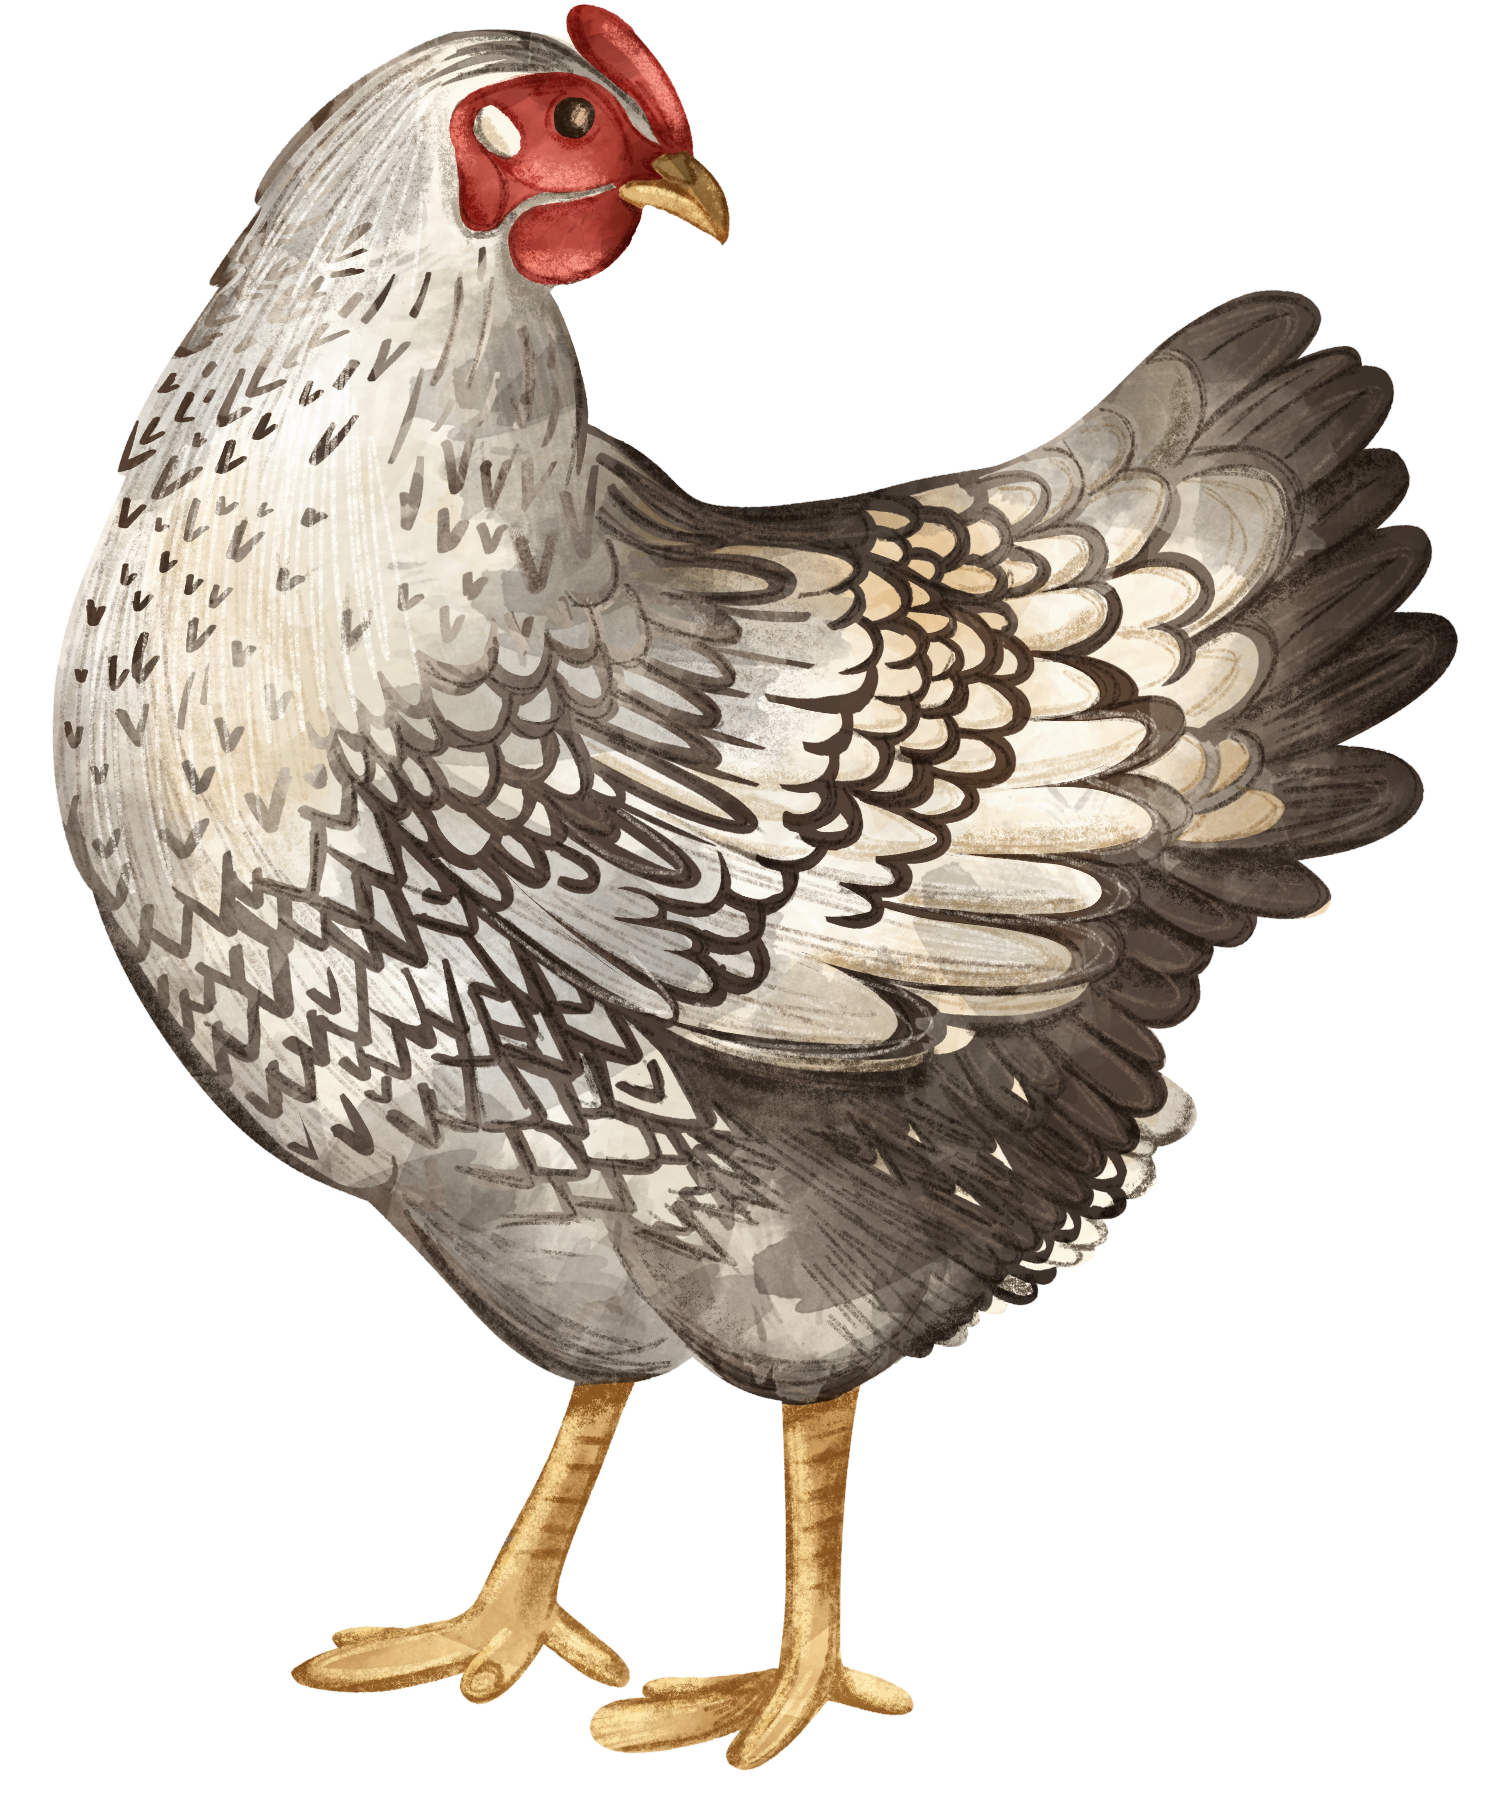
Want a coop of your own just like this one? Check out our building plans here!
Time is of the essence when you have baby chicks!
In the beginning of the summer (June), we embarked on a mission to design a new coop for our 2 older hens and 4 new baby chicks. Looking back, I wish we had given ourselves more time and started the project in early spring BEFORE getting the chicks, as they grew so fast! Additionally, I underestimated how long it would take to construct the new coop. To be exact, it required 1 full week of vacation and 4 more weeks of working every evening and weekend. Since we are not professional builders, the learning curve made the process take much longer than anticipated.
To ensure we built a coop that was safe and functional, I conducted extensive research online, delving into proper chicken keeping practices and seeking inspiration from Pinterest. Most importantly, I incorporated my own past experiences and the elements that I disliked in previous chicken coops into the new design. Here's what we came up with:

The 4 most important elements for designing our new chicken coop:
- Proper amount of space
- A walk-in coop for *easy* daily cleaning
- Predator-proof
- Nesting boxes + storage area
Let’s break these down a little further:
1. Capacity (proper amount of space)
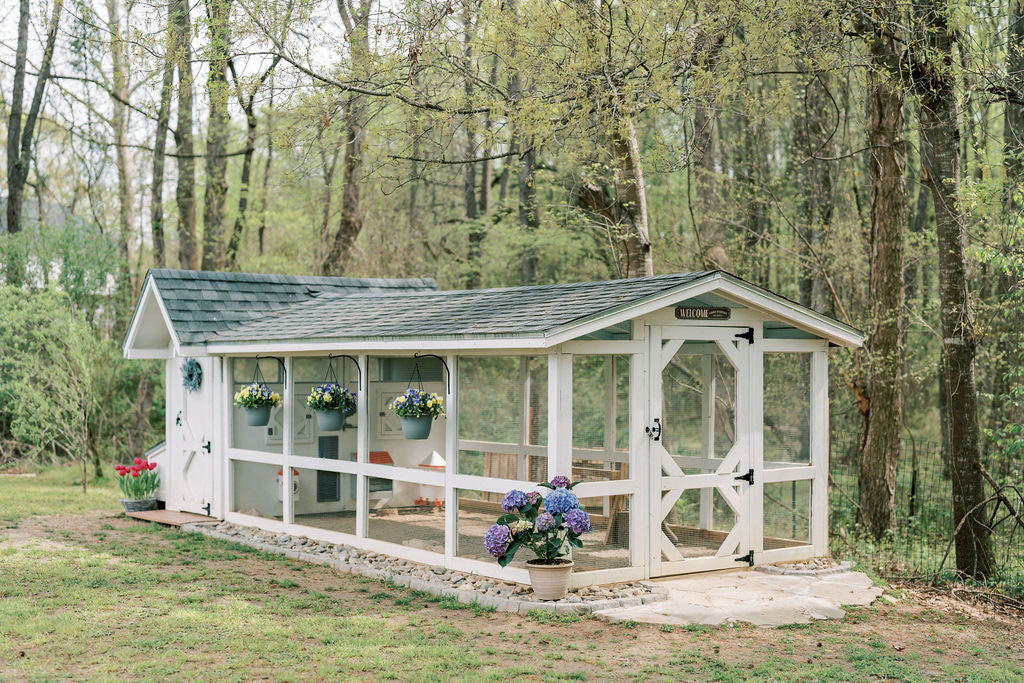
Since our first out-of-the-box chicken coop was extremely small for the number of chickens we had (despite the manufacturer’s recommendations) I knew I wanted a coop that would hold the chickens we already had plus have some room to grow. We decided that our personal max would be 10 chickens (we already had 6) so we made the coop big enough for 10-12.
The Square Footage Rule: 3 sq ft of space per chicken in the coop & 10-12 sq ft of space per chicken in the run. This is a great thing to keep in mind while shopping for a coop or preparing to build your own!

Our coop is 4’ x 8’ = 32 sq ft (not including the nesting boxes) and the run is 16’ x 8’ (128 sq ft)
2. Biosecurity & Easy Cleaning
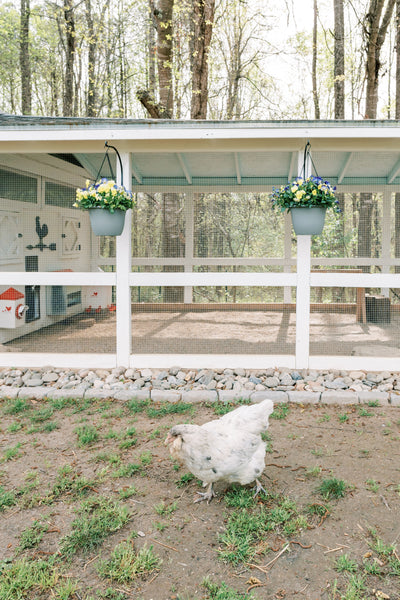
We absolutely needed a coop that was easy to clean & kept our chickens safe during the day should they need to be held inside the run. A coop and run tall enough to walk into makes cleaning SO much easier. Who wants to crawl on the ground of a poop-covered chicken run to care for their chickens? Not me!
A clean coop = healthy chickens.
Chickens poop, a lot. Their poop contains bacteria and, if lived in and not maintained properly, can make your chicken sick. I recommend to clean your chicken coop and run daily. For more tips on maintaining your chicken coop and recommended materials for easy cleaning, check out this post here!


• Materials we chose for the coop: Coffee ground bedding by Powered By Coffee or hemp bedding by Eaton Pet & Pasture
• Materials we chose for the run: Construction sand. Visit your local landscape company and ask for something that is:
1. coarse
2. not sharp
3. not too fine
4. not play sand
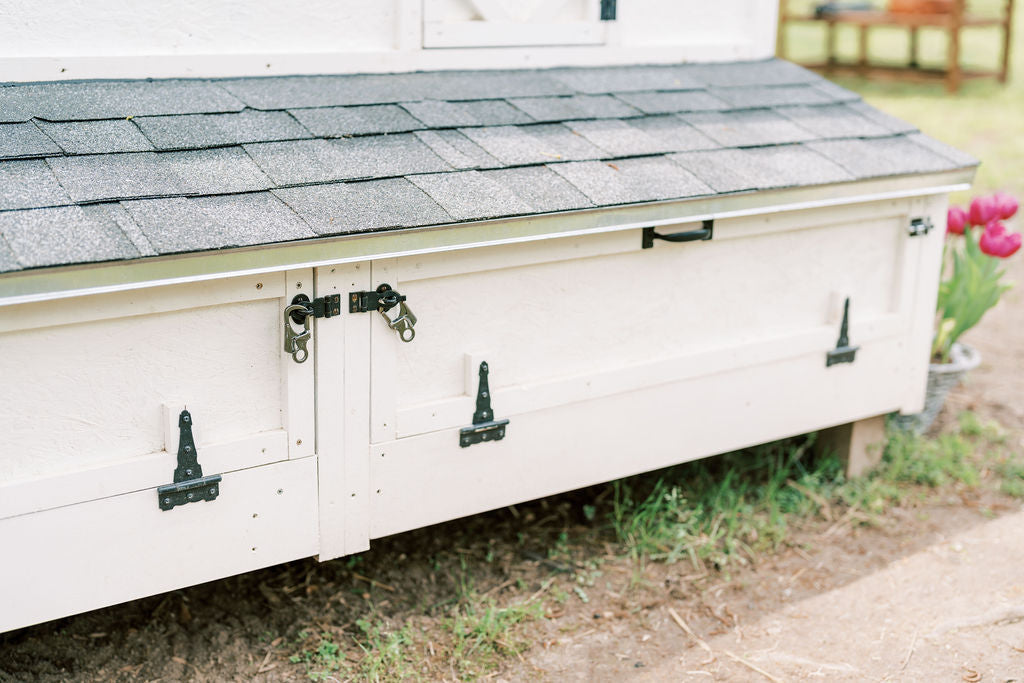
3. Predator Proofing
This was one of the more important factors when constructing our new coop. We have racoons, hawks, foxes and coyotes in our area and we needed a coop that was secure.
We used ½” hardware cloth on the run walls and secured it with washers and screws. We ‘sandwiched’ the hardware cloth between 2x4s (the framing outside the run) and 1x4s inside the run. We also covered any spaces that were over ½” with the same cloth – like the eaves in the coop.
I would not recommend using chicken wire for your run and/or coop. Chicken wire is great at keeping chickens in an area but terrible at keeping predators out. Using chicken wire on the coop and/or run is not an adequate way to protect your chickens.
Another great addition to predator proof our coop and run was a hardware cloth barrier. We skirted the same ½” hardware cloth 3-4ft around the base of the run and buried it under a couple inches of dirt. We also built a rock garden on one side of the run for even more security. This hardware cloth and rock barrier protects the chickens from anything that might try to dig under the coop.
4. Nesting Boxes & Storage
I wanted to be able to access the nesting boxes from outside the coop. I have a young son who loves to collect eggs with me so the outside nesting box is perfect for him to ‘help’ without having to open the main chicken coop door.
I also wanted a small storage area where I could keep chicken supplies, like Grubbly Grubs and First Saturday Lime, down at the coop.

We were easily able to section off half of the nesting box for the storage area leaving us with 3 nesting boxes for our 6 chickens. You only need 1 nesting box for every 3-4 chickens so we should be fine with these 3, even if we are at full capacity. If for some reason we feel like we need more nesting boxes, we could easily open up part of the storage area to add another box.
Putting it all together
Equipped with a plan in our heads (we actually didn’t have building plans at the time and I wish we did!), we set off to build the new coop. There was a lot of trial and error, looking up how to cut angles on youtube and adjusting. But we did it!
The most important aspect in our build, I believe, was getting the foundation level. We used cinder blocks dug into the ground and 4x4s to create an extremely level foundation. Once that was set, building up was a little easier.
Sand:
Once we had the structure built and secure, we added construction grade sand to the run. Sand will be your best friend. It’s easy to clean and they can use the larger rocky bits for grit. Just remember to buy sand that is a bit rocky and coarse. Play sand or sand that is super fine could cause respiratory problems in your flock.
Paint:
I used plain old white exterior paint to paint the outside of the coop and run. It’s amazing what a little white paint can do! I have plans to paint the interior of the coop and run this coming spring (check out the progress on my social accounts: Instagram and TikTok!)
Lighting:
We do not use artificial light in the coop to trick our chickens into laying year round. If you weren’t aware, chickens stop laying in the fall/winter when they molt (lose their leathers). During this time they use their energy to grow new feathers instead of producing eggs. I recommend letting them go through their natural cycle instead of adding artificial light, which can stress their bodies.
We do, however, have a battery powered LED light bulb in the coop. It’s a great light source if I have to check on the chickens at night or I need a little extra light while I am cleaning the coop. Want to know how I made the light fixture? Check out this post here!
Introducing our chickens to the new coop
Once we had everything set up, we introduced our 2 older hens first. They made it home right away! We added the babies gradually when they were 6-8 weeks old (read how to introduce baby chicks to your existing flock here) and now they’re living peacefully together in their forever home.


